How to Buy Hosting on Hostinger in 2026: Step-by-Step Guide
Buying web hosting is one of the first steps when you want to launch a website. However, if you are purchasing hosting for the first time, choosing a plan, selecting a subscription period, registering a domain, and completing the payment can feel confusing.
Hostinger offers several hosting options for blogs, business websites, WordPress projects, and online stores. The purchasing process is straightforward, but you should understand the plan features and total cost before paying.
In this guide, we will explain how to buy hosting on Hostinger, from selecting a suitable plan to completing checkout and setting up your website. We will also cover important things to check so you can avoid choosing the wrong subscription.
Quick overview: Visit Hostinger's official website, compare the available hosting plans, select a plan and subscription period, choose or connect a domain, create your account, review the checkout amount, select a payment method, and complete the purchase. After payment, log in to your dashboard to set up your hosting.
Before visiting the checkout page, take a few minutes to understand what you are purchasing. Hosting is the service that stores your website's files and makes them accessible to visitors online.
A domain name is different from hosting. Your domain is the website address people type into their browser, while hosting provides the server space and resources that run your website.
Website address
Domain name
For example, example.com. It gives visitors an address they can use to reach your website.
Website infrastructure
Web hosting
Stores your website files, databases, and other resources so people can access your website.
You may be able to register a new domain during checkout, claim an eligible domain offer, or connect a domain that you already own. Check the offer conditions because free-domain eligibility and registration periods depend on the product and subscription.
Step 1: Visit Hostinger and Choose a Hosting Plan
1
Open the official Hostinger website
Visit the official Hostinger website. From the navigation or hosting section, open the available hosting plans.
Review the plan names, website limits, storage, backups, and other included features. Do not select a plan only because its promotional monthly price looks low.
Think about how many websites you want to host, whether you need WordPress, and how much traffic you expect.
Which Hostinger Plan Should You Choose?
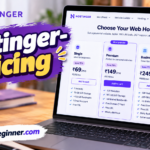
Hostinger's global pricing page currently displays three main web hosting options: Premium, Unlimited, and Cloud Startup. Their features and resource limits are different, so the best choice depends on your project.
Plan
Displayed promotional rate
Websites
Storage
Renewal rate
Premium
$2.49/mo
3
20 GB SSD
$10.99/mo
Unlimited
$3.49/mo
Unlimited*
50 GB NVMe
$16.99/mo
Cloud Startup
$7.99/mo
Unlimited*
100 GB NVMe
$25.99/mo
Pricing snapshot: The displayed promotional rates above are based on the 48-month offers shown on Hostinger's global USD pricing page. The full upfront totals are $119.52 for Premium, $167.52 for Unlimited, and $383.52 for Cloud Startup. The listed renewal rates are monthly equivalents; check the renewal term and checkout details before purchasing.
*Unlimited website allowances are subject to Hostinger's fair usage policy and do not mean unlimited CPU, RAM, or other server resources.
Important: These are a pricing snapshot, not a guaranteed checkout quote. Offers, plan names, features, and renewal rates can change. Confirm the full amount displayed in your own checkout before paying. Taxes may also affect the final total.
Premium Plan: For Beginners and Smaller Websites
Premium can be a starting point if you are launching a blog, portfolio, or a small business website. The current global offer lists support for three websites, 20 GB SSD storage, and weekly backups.
Unlimited Plan: For Multiple Websites
Unlimited may be worth comparing if you want to host several websites under one account or need more storage and daily backups. Its website allowance is subject to fair usage conditions.
Cloud Startup: For Projects Needing More Resources
Cloud Startup is positioned for agencies or projects that need more hosting resources. It lists 100 GB NVMe storage and daily and on-demand backups in the current global offer.
If you are unsure which plan to choose, read our guide to Hostinger plans compared before purchasing.
Step 2: Select Your Subscription Period
3
Choose how long you want to purchase hosting
After selecting a plan, Hostinger will show the available subscription durations. Depending on the plan and regional offer, options may include 1, 12, 24, or 48 months.
Longer subscriptions may offer a lower average monthly rate, but they usually require a larger upfront payment. A shorter term may cost more per month while giving you less long-term commitment.
Understand the difference between monthly price and total payment
Suppose a hosting offer displays $2.49 per month for a 48-month subscription. That does not mean you pay only $2.49 today. The full promotional amount is calculated across the subscription period.
Example: At $2.49 per month for 48 months, the promotional upfront total is $119.52. You should also check the renewal rate that applies after the initial term.
Before continuing, compare these four details:
The promotional monthly equivalent.
The full amount charged at checkout.
The length of the subscription.
The renewal price and renewal period.
Step 3: Choose or Connect Your Domain
4
Select your domain option
Depending on the checkout flow and offer, you may be asked to choose a new domain, claim an eligible free domain, or use a domain you already own.
Option A: Register a new domain
If you do not have a domain yet, search for the website name you want. For example, if you are starting a technology blog, you might search for a short, memorable name that fits your topic.
Check the spelling carefully and make sure the domain extension is suitable for your audience. A domain offer may be limited to certain extensions and registration conditions.
Option B: Use a domain you already own
If you purchased your domain from another registrar, you may be able to connect it to your Hostinger hosting account. This generally involves updating the domain's nameservers or DNS records according to Hostinger's instructions.
You do not necessarily need to transfer the domain registration to Hostinger just to use its hosting service.
Before continuing: Check whether the domain is included in your selected offer, whether it is free only for the first year, and what its renewal cost will be. Domain registration and hosting renewal may be billed separately.
Step 4: Create Your Hostinger Account
5
Register or sign in
At checkout, Hostinger will ask you to create an account or sign in to an existing one. You can generally register using your email address or an available social sign-in option.
If you are a new customer, enter an email address that you can access. Use a strong, unique password if you create an account with an email and password.
If you already have a Hostinger account, sign in rather than creating another account unnecessarily. Keeping your hosting services under the intended account makes future billing and management easier.
Step 5: Choose a Payment Method
6
Select an available payment option
Once your account details are ready, choose one of the payment methods displayed in your checkout.
Payment options depend on the Hostinger regional brand and the account currency. The global USD checkout lists options such as credit and debit cards, PayPal, Apple Pay, Google Pay, and other supported methods. Not every method is available in every region.
Common payment options
Credit or debit card: Enter your card details if this option is available.
PayPal: Select PayPal and follow the checkout instructions if supported.
Google Pay or Apple Pay: Use the available wallet option if it appears in your checkout.
Other regional methods: Select any additional payment option shown for your account's region.
Enter the required billing details accurately. If you are purchasing hosting for a business, check whether the checkout provides an option to add company details and tax information.
Currency reminder: Your account's regional Hostinger brand determines its currency and available payment methods. Check the currency shown at checkout before paying. The USD prices in this guide are from Hostinger's global USD pricing page and may not match another regional checkout.
Step 6: Review Your Order and Complete Payment
7
Check every detail before paying
Before submitting payment, review the order summary carefully. This is your final opportunity to confirm that the plan and subscription match your requirements.
Use this final checkout checklist
Correct hosting plan selected.
Correct subscription duration selected.
Full upfront amount reviewed.
Renewal price and renewal period checked.
Domain registration or connection option reviewed.
Optional extras checked for additional charges.
Coupon code applied, if you have a valid one.
Billing details and payment method verified.
If you have a coupon code, enter it in the designated checkout field and select the option to apply it. Confirm that the total changes before completing the purchase. Do not assume a discount has been applied simply because a code was entered.
Once everything looks correct, submit the payment using the checkout button. For card payments, follow the instructions displayed by Hostinger. Other payment methods may open an additional confirmation window or require you to authorize the transaction.
After the payment is successfully processed, Hostinger should make the purchased hosting service available in your account. Keep the payment confirmation and invoice for your records.
What to Do After Buying Hosting on Hostinger
Completing payment is not the end of the process. You still need to configure your hosting and publish your website.
1. Open your Hostinger dashboard
Sign in to your Hostinger account and open the dashboard. Find the hosting service you purchased and select its management option.
2. Set up your website
Hostinger may guide you through a setup flow. Depending on your needs, you can choose WordPress, a website builder, or another supported setup option.
3. Connect your domain
If your domain is not already connected, follow the instructions in your dashboard to point it to your hosting account. DNS changes may take time to become visible across the internet.
4. Enable and check SSL
SSL helps secure the connection between your website and its visitors. Check the SSL status in your hosting dashboard and make sure your website loads using HTTPS.
5. Install WordPress if needed
If you want to use WordPress, follow the available installation process. Once installed, you can log in to the WordPress dashboard, choose a theme, add plugins, and start creating pages and posts.
6. Configure backups and security
Review the backup schedule included in your plan. Set up appropriate security measures, use strong passwords, keep software updated, and understand how to restore your website if something goes wrong.
7. Test your website
Visit your domain and check that the website loads correctly. Test the navigation, contact forms, mobile layout, images, and important links before sharing the website publicly.
Common Mistakes to Avoid When Buying Hostinger Hosting
Choosing only by promotional price
Always compare the upfront payment and renewal cost, not just the displayed monthly equivalent.
Buying more resources than needed
Choose a plan based on your current website requirements and realistic growth expectations.
Ignoring domain renewal
A domain included in an offer may have a separate renewal price after its included registration period.
Missing optional extras
Review the order summary so you understand every additional product or service included in the checkout.
Not checking the currency
Confirm the regional brand and currency displayed before entering payment information.
Forgetting account security
Use a strong password and enable available account security protections after registration.
Final Thoughts: Is Buying Hosting on Hostinger Easy?
Buying hosting on Hostinger is a relatively straightforward process. You select a hosting plan, choose a subscription period, register or connect a domain, create an account, select a payment method, and complete checkout.
The most important part is choosing the right plan and understanding the full cost. Compare the resources included, upfront payment, renewal price, domain terms, and any optional extras before purchasing.
Once your payment is complete, use the Hostinger dashboard to configure your domain, set up WordPress or another website platform, check SSL, and prepare your website for visitors.
Ready to Purchase Your Hosting Plan?
Compare the available Hostinger plans and review their features, subscription terms, and renewal prices before choosing the one that fits your website.
Visit Hostinger's official website, choose a hosting plan, select a subscription period, choose or connect a domain, create an account, select a payment method, and complete checkout. You can then manage the hosting service from your Hostinger dashboard.
2. Which Hostinger plan should a beginner buy?
A beginner launching one or a few standard websites can compare the Premium plan first. However, the right option depends on the number of websites, storage, backups, and resources required. Always check the current plan details before purchasing.
3. Can I buy a domain and hosting together on Hostinger?
Yes. Depending on the plan and current offer, you may be able to register or claim an eligible domain while purchasing hosting. You can also connect a domain that you already own.
4. Does Hostinger require full payment upfront?
Hostinger's displayed promotional monthly rates for longer-term offers generally represent an average monthly cost, with the subscription paid upfront. Check the checkout summary for the actual amount charged and the selected billing period.
5. What payment methods does Hostinger accept?
Available methods depend on the regional Hostinger brand. Options may include credit and debit cards, PayPal, Google Pay, Apple Pay, and regional payment methods. Check the methods displayed in your checkout.
6. Can I use my existing domain with Hostinger hosting?
Yes. You can generally connect an existing domain by updating its nameservers or DNS records according to Hostinger's instructions. You do not necessarily need to transfer the domain registration.
7. What should I do after purchasing Hostinger hosting?
Open your hosting dashboard, complete the website setup, connect your domain, check SSL, install WordPress if required, configure backups and security, and test your website before sharing it.
8. Can I upgrade my Hostinger plan later?
Hostinger provides upgrade options for eligible hosting services. If your website grows or needs more resources, review the available upgrade options and any associated costs in your account.
9. Does Hostinger offer a money-back guarantee?
Hostinger's refund policy provides a 30-day money-back guarantee for eligible purchases. Some products and services have different refund conditions, so review the current refund policy before purchasing.
Editorial note: This guide explains the general Hostinger purchasing process. Checkout screens, plan availability, prices, subscription periods, and payment methods may vary by regional brand and change over time. Always verify the current order summary and applicable terms before paying.
EXCLUSIVE DEALBlackFriday Deal
SaveGet up to 82% off WordPress Hosting plan this Black Friday!