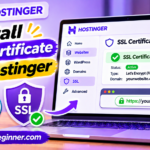
If your WordPress website is hosted on Hostinger, enabling SSL is an important step before sharing it with visitors. An SSL certificate allows your website to use HTTPS, which encrypts information exchanged between the visitor's browser and your website.
Hostinger includes free Lifetime SSL certificates with eligible Web, Cloud, and Agency hosting plans. For supported websites, certificates are generally installed automatically after the domain is added to the hosting plan and correctly pointed to Hostinger.
In this guide, you will learn how to check your SSL status, install a certificate manually, enable HTTPS in WordPress, and troubleshoot common SSL problems.
Quick answer: Open Hostinger → Websites → Manage site → Security → SSL. Check whether your certificate is Active. If it is not installed, use Install SSL when available. Then verify that your WordPress website loads using https://.
SSL stands for Secure Sockets Layer. It is the traditional name for a technology used to establish encrypted connections between websites and visitors. Modern secure connections use TLS, but the term SSL certificate is still widely used by hosting providers.
When a website has a valid certificate and HTTPS is configured correctly, visitors can connect to it through an encrypted connection.
Encrypts Data
HTTPS helps protect information exchanged between a visitor's browser and your website while it is transmitted.
Improves Visitor Trust
A valid HTTPS connection avoids the ordinary browser warning associated with an unsecured HTTP connection.
Protects Login Sessions
Encryption helps protect WordPress login credentials and other information sent between the browser and server.
Supports SEO Best Practices
HTTPS is a recommended website security practice and a lightweight ranking signal used by search engines.
HTTP vs HTTPS
Feature
HTTP
HTTPS
Connection
Not encrypted by TLS
Encrypted using TLS
Address
Starts with http://
Starts with https://
Browser security indicator
May show a Not secure warning
Shows a secure connection indicator when valid
Recommended for websites
No
Yes
For example, a website using HTTP has an address like:
http://example.com
After SSL is active and HTTPS is configured, the address becomes:
https://example.com
2. Does Hostinger Provide Free SSL for WordPress?
Hostinger includes free Lifetime SSL certificates with eligible Web, Cloud, and Agency hosting plans. According to Hostinger's documentation, certificates are automatically installed for domains and subdomains added to supported hosting plans.
This means most users with an eligible hosting plan do not need to purchase a separate SSL certificate just to enable HTTPS on their WordPress website.
Important distinction: SSL availability and installation depend on the hosting service and website type. Hostinger AI Website Builder handles SSL automatically in the background after the website is published. Its manual SSL management options differ from those available for WordPress and file-based websites.
What needs to be ready before SSL installation?
Your domain or subdomain must be added to the Hostinger hosting plan.
The domain must point to Hostinger's servers.
DNS changes must have propagated sufficiently for the certificate installation process.
Your website must use a supported hosting setup.
3. How to Check Your SSL Certificate Status on Hostinger
Before installing a certificate manually, check whether Hostinger has already installed one automatically.
1 Log In to Hostinger
Visit the Hostinger website and sign in using your account credentials.
2 Open the Websites Section
Go to Websites in the Hostinger dashboard and find the WordPress website you want to check.
3 Open Manage Site
Click Manage site or the available dashboard shortcut next to your domain. This opens the website's management area.
4 Open the SSL Section
Find Security → SSL in the sidebar. Select it to view the SSL management page.
5 Review the Certificate Status
Check the status displayed next to your domain or subdomain.
Active: The certificate is installed and available.
Installing: The installation process is still running.
Not installed or unavailable: Check the domain configuration and available installation options.
Tip: If your certificate is already Active, you do not need to install another one. Continue to the HTTPS configuration and verification steps instead.
4. How to Install SSL Manually on Hostinger
If the certificate was not installed automatically, Hostinger provides an option to install its included Lifetime SSL manually for supported websites.
1 Open Your Website Dashboard
Sign in to Hostinger and go to Websites. Find the domain or subdomain and open its management dashboard.
2 Navigate to Security → SSL
Use the sidebar to find the SSL section. Open it to view the certificate options for your website.
3 Select Install SSL
If no certificate is installed and the option is available, click Install SSL.
Hostinger will start installing the certificate for the selected domain or subdomain.
4 Wait for Installation
During installation, the status may show Installing. Wait until it changes to Active before testing your website.
5 Verify the Certificate
Open your website in a private browser window using its HTTPS address. You can also clear your browser cache before checking again.
What if Install SSL is missing? Hostinger explains that this can mean a certificate is already installed. Check the existing certificate status first. Do not uninstall an active certificate simply to make the installation button appear.
What if SSL installation fails?
Check that your domain is pointed to Hostinger and that DNS propagation has completed. If the domain was recently connected, allow time for the DNS changes to take effect and try the installation again.
If the certificate still fails, check for conflicting DNS records or contact Hostinger support with the installation error.
5. How to Enable HTTPS on Your WordPress Website
After the SSL certificate is active, make sure WordPress uses the secure HTTPS address. Hostinger recommends updating the WordPress Address and Site Address settings when HTTPS is not working correctly.
1 Open WordPress Admin
Log in to your WordPress dashboard. You can access it through the WP Admin shortcut in Hostinger or by visiting:
https://yourdomain.com/wp-admin
2 Open General Settings
From the WordPress sidebar, navigate to Settings → General.
3 Update WordPress Address (URL)
Find the WordPress Address (URL) field. If it still uses HTTP, change it to HTTPS.
https://yourdomain.com
4 Update Site Address (URL)
Find the Site Address (URL) field and change it to the HTTPS version of your domain as well.
https://yourdomain.com
5 Save Your Changes
Scroll down and click Save Changes. WordPress will now use the HTTPS address configured in these settings.
Important: Confirm that your SSL certificate is active before changing the WordPress URLs. If HTTPS is not working yet, changing these settings prematurely can make the website difficult to access.
6. How to Force HTTPS on Hostinger
After SSL installation, you may want every visitor to use the HTTPS version of your website instead of HTTP.
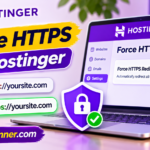
Hostinger's SSL management page provides a Force HTTPS option for supported hosting plans.
1 Open Hostinger SSL Settings
Go to Hostinger → Websites → Manage site → Security → SSL.
2 Find Your Domain
Locate the domain or subdomain for which you want to enforce HTTPS.
3 Select Force HTTPS
Open the options menu next to the domain and select Force HTTPS if it is not already enabled.
4 Test the Website
Open the HTTP version of your domain in a browser and check whether it redirects to HTTPS.
http://yourdomain.com
The browser should reach the secure address:
https://yourdomain.com
Hostinger notes that HTTPS is forced by default after SSL installation on supported Web and Cloud hosting websites. The available controls differ for some hosting types, including Agency plans.
7. How to Fix Mixed Content Warnings in WordPress
Sometimes a website has an active SSL certificate but the browser still displays a security warning or the page design appears broken. One possible reason is mixed content.
Mixed content happens when a page loads over HTTPS but some resources, such as images, scripts, stylesheets, or fonts, are still requested using HTTP.
Common causes of mixed content
Images inserted into pages using old HTTP URLs.
Theme or plugin resources loaded over HTTP.
Hardcoded HTTP links in custom HTML or CSS.
Old links stored in the WordPress database.
External resources that do not support HTTPS.
Steps to fix mixed content
1 Confirm SSL Is Active
Check the SSL status in Hostinger before investigating website content. An active certificate is required for HTTPS to work correctly.
2 Check WordPress URLs
Open Settings → General and confirm that both WordPress Address and Site Address use HTTPS.
3 Find HTTP Resources
Use your browser's developer tools to inspect the Console or Security information. Look for resources requested using HTTP rather than HTTPS.
4 Update the Affected URLs
Update old image, script, stylesheet, and other resource URLs to HTTPS where the resource supports it. Review custom theme files and plugin settings if necessary.
5 Clear Website Cache
Clear your WordPress caching plugin, Hostinger cache if enabled, and browser cache. Then reload the website to check whether the warning has disappeared.
Database caution: If you use a search-and-replace tool to update old URLs, choose a WordPress-compatible tool that handles serialized data correctly. Create a database backup before making bulk replacements.
8. Common Hostinger WordPress SSL Errors and Fixes
Problem 1: Your connection is not private
This browser warning can appear when the certificate is missing, invalid, expired, mismatched with the domain, or not yet available after DNS changes.
Check whether the certificate status is Active in Hostinger.
Confirm that the domain points to the correct hosting service.
Allow time for DNS propagation if the domain was recently connected.
Try the website in a private browser window.
Problem 2: SSL installation failed
Check that the domain is added to your hosting plan and correctly pointed to Hostinger. Review DNS records for conflicts and retry installation after the domain configuration is correct.
Problem 3: ERR_TOO_MANY_REDIRECTS
A redirect loop can happen when WordPress URL settings, hosting HTTPS rules, a security plugin, or a CDN's SSL mode conflict.
Check WordPress Address and Site Address settings.
Review Force HTTPS settings in Hostinger.
Check redirect rules in plugins and configuration files.
If using Cloudflare, review its SSL/TLS mode and avoid conflicting redirect rules.
Problem 4: Website works with HTTP but not HTTPS
Verify that the certificate is installed and active for the exact domain or subdomain you are visiting. Also check whether the domain has finished pointing to Hostinger.
Problem 5: Website layout looks broken after enabling HTTPS
This can happen when images, stylesheets, scripts, or fonts are still loading through HTTP. Check for mixed content and update the affected resource URLs.
Problem 6: SSL works on the main domain but not a subdomain
Check whether the subdomain has been added to the hosting plan and whether its DNS records point to the correct destination. Confirm that the certificate covers that specific subdomain.
Problem 7: SSL redirect loop after changing WordPress URLs
Review the WordPress URL settings, Hostinger HTTPS rules, and any additional redirect configuration. Avoid adding multiple overlapping redirects. If you cannot access WordPress Admin, use Hostinger's supported recovery tools or contact support before editing configuration files.
Before changing advanced settings: Create a backup of your WordPress files and database. SSL problems are often caused by DNS, URL, or redirect configuration, so changing several settings at once can make troubleshooting harder.
9. How to Verify Your WordPress SSL Installation
Once you have installed SSL and enabled HTTPS, complete these checks to confirm that the website is working correctly.
Open your website using the HTTPS address.
Confirm that the browser does not show a certificate warning.
Check that the HTTP version redirects to HTTPS if Force HTTPS is enabled.
Open important pages and confirm that images and styles load correctly.
Check that the WordPress login page also uses HTTPS.
Inspect the browser console for mixed content warnings.
Clear caches and test the website again.
Example of a secure website address
https://yourdomain.com
If your website loads correctly using HTTPS and the browser recognizes the certificate as valid, your SSL setup is working as expected.
10. WordPress SSL Setup Checklist
Use this checklist before considering the SSL setup complete.
The domain is added to the correct Hostinger hosting plan.
The domain points to Hostinger's servers.
The SSL certificate status shows Active.
WordPress Address uses HTTPS.
Site Address uses HTTPS.
Force HTTPS is enabled where supported and appropriate.
The website loads without certificate warnings.
Images, stylesheets, and scripts load correctly.
Important pages have been tested.
Backups are available before further security changes.
11. Frequently Asked Questions
Does Hostinger provide free SSL for WordPress websites?
Hostinger includes free Lifetime SSL certificates with eligible Web, Cloud, and Agency hosting plans. For supported websites, certificates are generally installed automatically after the domain is added to the hosting plan and pointed correctly.
How do I install SSL on WordPress Hostinger?
Open Hostinger → Websites → Manage site → Security → SSL. If the certificate is not already installed, select Install SSL when the option is available. Wait until the status changes to Active.
How do I force HTTPS on Hostinger?
Open the SSL section in your Hostinger website dashboard, find your domain, and select Force HTTPS if the option is available. Then verify that HTTP requests redirect to HTTPS.
Why is my WordPress website still showing Not Secure?
The certificate may not be installed or active, the domain may not point to the correct server, or the website may still load resources over HTTP. Check SSL status, WordPress URLs, and mixed content warnings.
Do I need to renew Hostinger's free Lifetime SSL manually?
Hostinger describes its included Lifetime SSL as automatically renewing while the website remains hosted with Hostinger on an eligible service. Check the SSL status in your account if you notice a certificate warning.
Can I use one SSL certificate for multiple domains?
Hostinger provides SSL certificates for eligible domains and subdomains hosted on supported plans. Each hosted domain or subdomain can have its own certificate; you do not need to transfer one certificate between websites.
What should I do if SSL installation fails?
Confirm that the domain is added to your hosting plan and pointed to Hostinger. Check DNS propagation and conflicting records, then retry the installation. Contact Hostinger support if the issue continues.
Does SSL improve WordPress SEO?
HTTPS is a recommended security practice and a lightweight ranking signal. It does not guarantee higher rankings, but using a valid HTTPS connection helps provide a secure experience for visitors.
Can I install SSL on a Hostinger subdomain?
Eligible Hostinger hosting plans support SSL for hosted domains and subdomains. Make sure the subdomain is added to your hosting plan and correctly pointed before checking its certificate status.
Secure Your WordPress Website with HTTPS
Start by checking your SSL status in Hostinger. If the certificate is active, configure WordPress to use HTTPS and verify that your pages load correctly. If installation fails, check the domain and DNS configuration before making advanced changes.
Editorial note: Hostinger's dashboard labels and SSL options may change. Certificate availability and management depend on the hosting plan and website type. Always check the current SSL status and instructions in your own Hostinger account before changing security or redirect settings.